안녕하세요.
지난 글에서 Firebase를 이용한 구글 로그인 연동 프로젝트 사전작업을 진행했습니다.
안하셨다면 다시 한 번 확인하시고 오시면 좋습니다.
2021.10.15 - [IT] - [안드로이드] Firebase를 이용한 구글 로그인 페이지 만들기 (사전작업)
[안드로이드] Firebase를 이용한 구글 로그인 페이지 만들기 (사전작업)
안녕하세요. 안드로이드 앱을 사용하다보면 로그인을 다양한 방법으로 진행하고 있는데, 그중에 구글아이디로 로그인하는 방법이 있습니다. 오늘은 그 방법을 앱에서 구현하는 방법을 공부해
madebyan.tistory.com
사전 작업을 모두 마쳤기 때문에 이제부터는 열심히 달려보겠습니다.
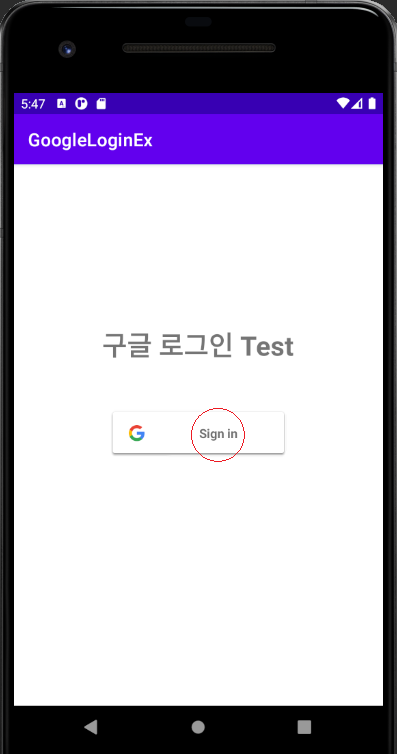
첫번째로 메인화면.xml 입니다.
처음 생성되면 주어지는 ConstraintLayout으로 만들겠습니다. ConstraintLayout가 아닌 LinearLayout등의 다른 레이아웃으로 구성해도 문제없습니다.
처음 주어진 TextView 밑에 com.google.android.common.SignInButton으로 구글 로그인 버튼 생성합니다.
이것은 사전작업에서 implementation을 제대로 했다면 에러없이 나타나지만, 에러가 나타난다면 사전작업을 다시한번 체크하셔야 합니다.
activity_main.xml <?xml version="1.0" encoding="utf-8"?> <androidx.constraintlayout.widget.ConstraintLayout xmlns:android="http://schemas.android.com/apk/res/android" xmlns:app="http://schemas.android.com/apk/res-auto" xmlns:tools="http://schemas.android.com/tools" android:layout_width="match_parent" android:layout_height="match_parent" tools:context=".MainActivity"> <TextView android:id="@+id/textView" android:layout_width="wrap_content" android:layout_height="wrap_content" android:text="구글 로그인 Test" android:textStyle="bold" android:textSize="30sp" app:layout_constraintBottom_toBottomOf="parent" app:layout_constraintHorizontal_bias="0.498" app:layout_constraintLeft_toLeftOf="parent" app:layout_constraintRight_toRightOf="parent" app:layout_constraintTop_toTopOf="parent" app:layout_constraintVertical_bias="0.322" /> <com.google.android.gms.common.SignInButton android:id="@+id/btn_google" android:layout_width="200dp" android:layout_height="wrap_content" android:layout_marginStart="8dp" android:layout_marginTop="50dp" android:layout_marginEnd="8dp" app:layout_constraintEnd_toEndOf="parent" app:layout_constraintStart_toStartOf="parent" app:layout_constraintTop_toBottomOf="@+id/textView" /> </androidx.constraintlayout.widget.ConstraintLayout>먼저 화면 구성을 모두 마무리 하고 java 로 들어가겠습니다.
로그인을 하고 난 후에 로그인 결과값을 화면에 뿌려주는 로그인 후 화면이 필요합니다.
어차피 결과 값을 가져오는 Activity도 필요하기 때문에 안드로이드 스튜디오에서 File - New - Activity - Empty Activity로 Activity와 xml파일을 추가합니다.
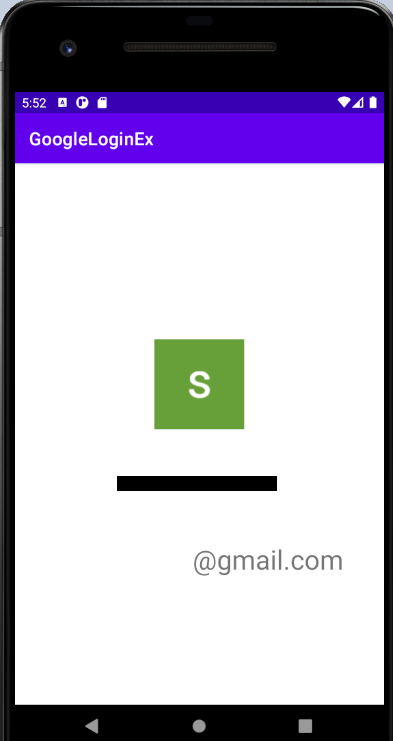
구글 로그인 결과 값으로 프로필 사진과 닉네임, 이메일 정보까지 가져와 보도록 하겠습니다.
activity_result.xml <?xml version="1.0" encoding="utf-8"?> <androidx.constraintlayout.widget.ConstraintLayout xmlns:android="http://schemas.android.com/apk/res/android" xmlns:app="http://schemas.android.com/apk/res-auto" xmlns:tools="http://schemas.android.com/tools" android:layout_width="match_parent" android:layout_height="match_parent" tools:context=".ResultActivity"> <TextView android:id="@+id/tv_result" android:layout_width="wrap_content" android:layout_height="wrap_content" android:layout_marginTop="44dp" android:text="닉네임" android:textSize="30sp" app:layout_constraintEnd_toEndOf="@+id/iv_profile" app:layout_constraintStart_toStartOf="@+id/iv_profile" app:layout_constraintTop_toBottomOf="@+id/iv_profile" /> <ImageView android:id="@+id/iv_profile" android:layout_width="100dp" android:layout_height="100dp" android:layout_marginTop="196dp" app:layout_constraintEnd_toEndOf="parent" app:layout_constraintStart_toStartOf="parent" app:layout_constraintTop_toTopOf="parent" app:srcCompat="@mipmap/ic_launcher_round" /> <TextView android:id="@+id/tv_email" android:layout_width="wrap_content" android:layout_height="wrap_content" android:layout_marginTop="40dp" android:text="이메일" android:textSize="30sp" app:layout_constraintEnd_toEndOf="@+id/tv_result" app:layout_constraintStart_toStartOf="@+id/tv_result" app:layout_constraintTop_toBottomOf="@+id/tv_result" /> </androidx.constraintlayout.widget.ConstraintLayout>이제 화면 구성을 완료했으니 자바코드로 넘어가겠습니다.
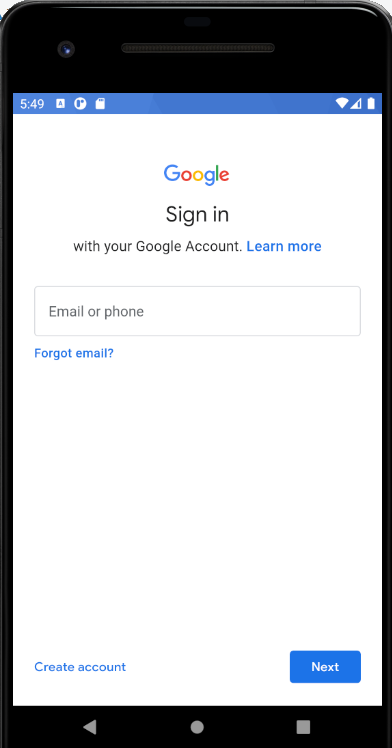
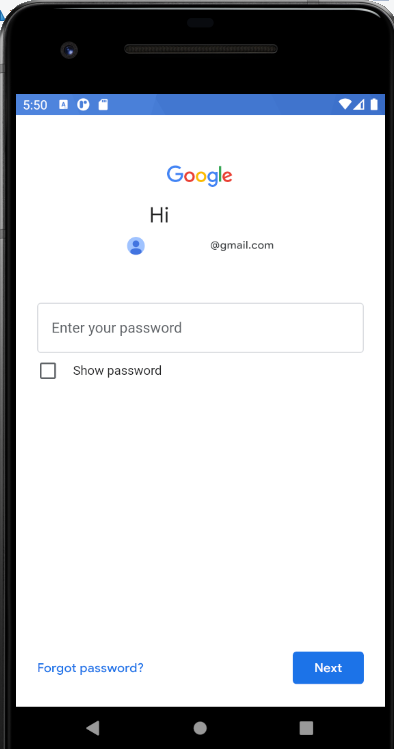
MainActivity.java import androidx.annotation.NonNull; import androidx.annotation.Nullable; import androidx.appcompat.app.AppCompatActivity; import android.content.Intent; import android.os.Bundle; import android.view.View; import android.widget.Toast; import com.google.android.gms.auth.api.Auth; import com.google.android.gms.auth.api.signin.GoogleSignIn; import com.google.android.gms.auth.api.signin.GoogleSignInAccount; import com.google.android.gms.auth.api.signin.GoogleSignInClient; import com.google.android.gms.auth.api.signin.GoogleSignInOptions; import com.google.android.gms.auth.api.signin.GoogleSignInResult; import com.google.android.gms.common.SignInButton; import com.google.android.gms.common.api.GoogleApi; import com.google.android.gms.common.api.GoogleApiClient; import com.google.android.gms.tasks.OnCompleteListener; import com.google.android.gms.tasks.Task; import com.google.firebase.auth.AuthCredential; import com.google.firebase.auth.AuthResult; import com.google.firebase.auth.FirebaseAuth; import com.google.firebase.auth.GoogleAuthProvider; public class MainActivity extends AppCompatActivity { private SignInButton btn_google; // 구글 로그인 버튼 private FirebaseAuth auth; // 파이어베이스 인증 객체 private GoogleSignInClient googleSignInClient; // 구글 API 클라이언트 객체 private static final int REQ_SIGN_GOOGLE = 200; // 구글 로그인 결과 코드 @Override protected void onCreate(Bundle savedInstanceState) { super.onCreate(savedInstanceState); setContentView(R.layout.activity_main); GoogleSignInOptions googleSignInOptions = new GoogleSignInOptions.Builder(GoogleSignInOptions.DEFAULT_SIGN_IN) .requestIdToken(getString(R.string.default_web_client_id)) .requestEmail() .build(); googleSignInClient = GoogleSignIn.getClient(this,googleSignInOptions); auth = FirebaseAuth.getInstance(); // 파이어베이스 인증 객체 초기화 btn_google = findViewById(R.id.btn_google); btn_google.setOnClickListener(new View.OnClickListener() { // 구글 로그인 버튼 클릭했을 때 이곳을 수행. @Override public void onClick(View view) { Intent intent = googleSignInClient.getSignInIntent(); // 구글이 만들어놓은 인증페이지로 이동. startActivityForResult(intent, REQ_SIGN_GOOGLE); } }); } @Override protected void onActivityResult(int requestCode, int resultCode, @Nullable Intent data) { // 구글 인증을 요청했을 떄 결과값을 되돌려 받는 곳. super.onActivityResult(requestCode, resultCode, data); if(requestCode == REQ_SIGN_GOOGLE){ Task<GoogleSignInAccount> task = GoogleSignIn.getSignedInAccountFromIntent(data); if(task.isSuccessful()){ GoogleSignInAccount account = task.getResult(); // account 라는 데이터는 구글 로그인 정보를 담고있다. (닉네임 프로필 사진url, 이메일주소등등..) resultLogin(account); // 로그인 결과 값 출력 수행하라는 메소드 } } } // 로그인 결과값 출력을 수행하는 메소드 private void resultLogin(GoogleSignInAccount account) { AuthCredential credential = GoogleAuthProvider.getCredential(account.getIdToken(),null); auth.signInWithCredential(credential) .addOnCompleteListener(this, new OnCompleteListener<AuthResult>() { @Override public void onComplete(@NonNull Task<AuthResult> task) { // 로그인이 성공하면 닉네임, 프로필사진, 이메일 정보등을 task에 저장한 후 ResultActivity로 넘김. if(task.isSuccessful()) { Toast.makeText(MainActivity.this, "로그인 성공~!!!", Toast.LENGTH_SHORT).show(); Intent intent = new Intent(getApplicationContext(), ResultActivity.class); intent.putExtra("nickname", account.getDisplayName()); //Uri 객체는 String으로 담아줘야한다. String.ValueOf 는 특정 자료형을 String 형태로 변환시켜주는 역할을 함. intent.putExtra("photoUrl", String.valueOf(account.getPhotoUrl())); intent.putExtra("e-mail",account.getEmail()); startActivity(intent); }else { Toast.makeText(MainActivity.this, "로그인 실패~!!!", Toast.LENGTH_SHORT).show(); } } }); } }구글 로그인을 완료했을때, 가져온 데이터를 화면에 뿌려줄 ResultActivity 자바파일을 만들어보겠습니다.
ResultActivity.java import androidx.appcompat.app.AppCompatActivity; import android.content.Intent; import android.os.Bundle; import android.widget.ImageView; import android.widget.TextView; import com.bumptech.glide.Glide; public class ResultActivity extends AppCompatActivity { private TextView tv_result; private ImageView iv_profile; private TextView tv_email; @Override protected void onCreate(Bundle savedInstanceState) { super.onCreate(savedInstanceState); setContentView(R.layout.activity_result); Intent intent = getIntent(); String nickname = intent.getStringExtra("nickname"); // MainActivity로 부터 닉네임 전달받음. String photoUrl = intent.getStringExtra("photoUrl"); // MainActivity로 부터 프로필 사진 Uri 전달받음. String email = intent.getStringExtra("e-mail"); // MainActivity로 부터 이메일 전달받음. tv_result = findViewById(R.id.tv_result); tv_result.setText(nickname); // 닉네임 text를 텍스트 뷰에 세팅. iv_profile = findViewById(R.id.iv_profile); Glide.with(this).load(photoUrl).into(iv_profile); //프로필 url을 이미지 뷰에 세팅 tv_email = findViewById(R.id.tv_email); tv_email.setText(email); } }특히 MainActivity에서 전달받은 구글 로그인 후 데이터의 지정명을 동일하게 지정을 해줘야 ResultActivity에서 받아서 화면에 정상적으로 뿌려줄수 있습니다.
MainActivity에서 "nickname"이면 ResultActivity에서도 "nickname"으로 동일하게 작성해야 제대로 뿌려줄수 있습니다.
<결과모습>
감사합니다.^^
'IT' 카테고리의 다른 글
| [Flutter] Windows 개발 환경 만들기 ① / Flutter SDK 다운로드 & 환경 변수 설정 (0) | 2022.09.15 |
|---|---|
| [CSS 정보] reset CSS란? / download 가능. (0) | 2022.06.30 |
| [안드로이드] 해시키(Hash Key) 알아내기 (0) | 2021.10.16 |
| [안드로이드] Firebase를 이용한 구글 로그인 연동 프로젝트 (사전작업) (0) | 2021.10.15 |
| [안드로이드] 안드로이드 스튜디오에서 Debug SHA-1 Key 추출하는 방법. (0) | 2021.10.15 |


댓글